WARNING!
Before beginning the installation, read this guide and any other documents accompanying this product. Failure to follow the installation procedures can lead to malfunction, danger to health and life, violation of law, and/or refusal of legal and commercial guarantees (if any). Shelly Europe Ltd. is not responsible for any loss or damage in case of incorrect installation or improper operation of this device due to failure to follow the user and safety instructions in this guide.
Prerequisites
Before you start, make sure you have:
- Shelly Smart Control app installed on your mobile device.
- An active account in the Shelly cloud.
- Bluetooth connectivity enabled on your mobile device.
Installation
Important Notes:
- The Gateway requires at least 500 mA to operate.
- The Gateway works only with 2.4 GHz Wi-Fi networks.
- The distance between the Gateway and your router should be less than 30 m.
- The distance between the Bluetooth sensors and the Gateway should be less than 20 m.
- Power up the Gateway by plugging it into a standard USB type A port.
- The LED indicator lights up in blue, showing that the device is in Access Point mode.
- Select + at the lower-right corner of the screen.
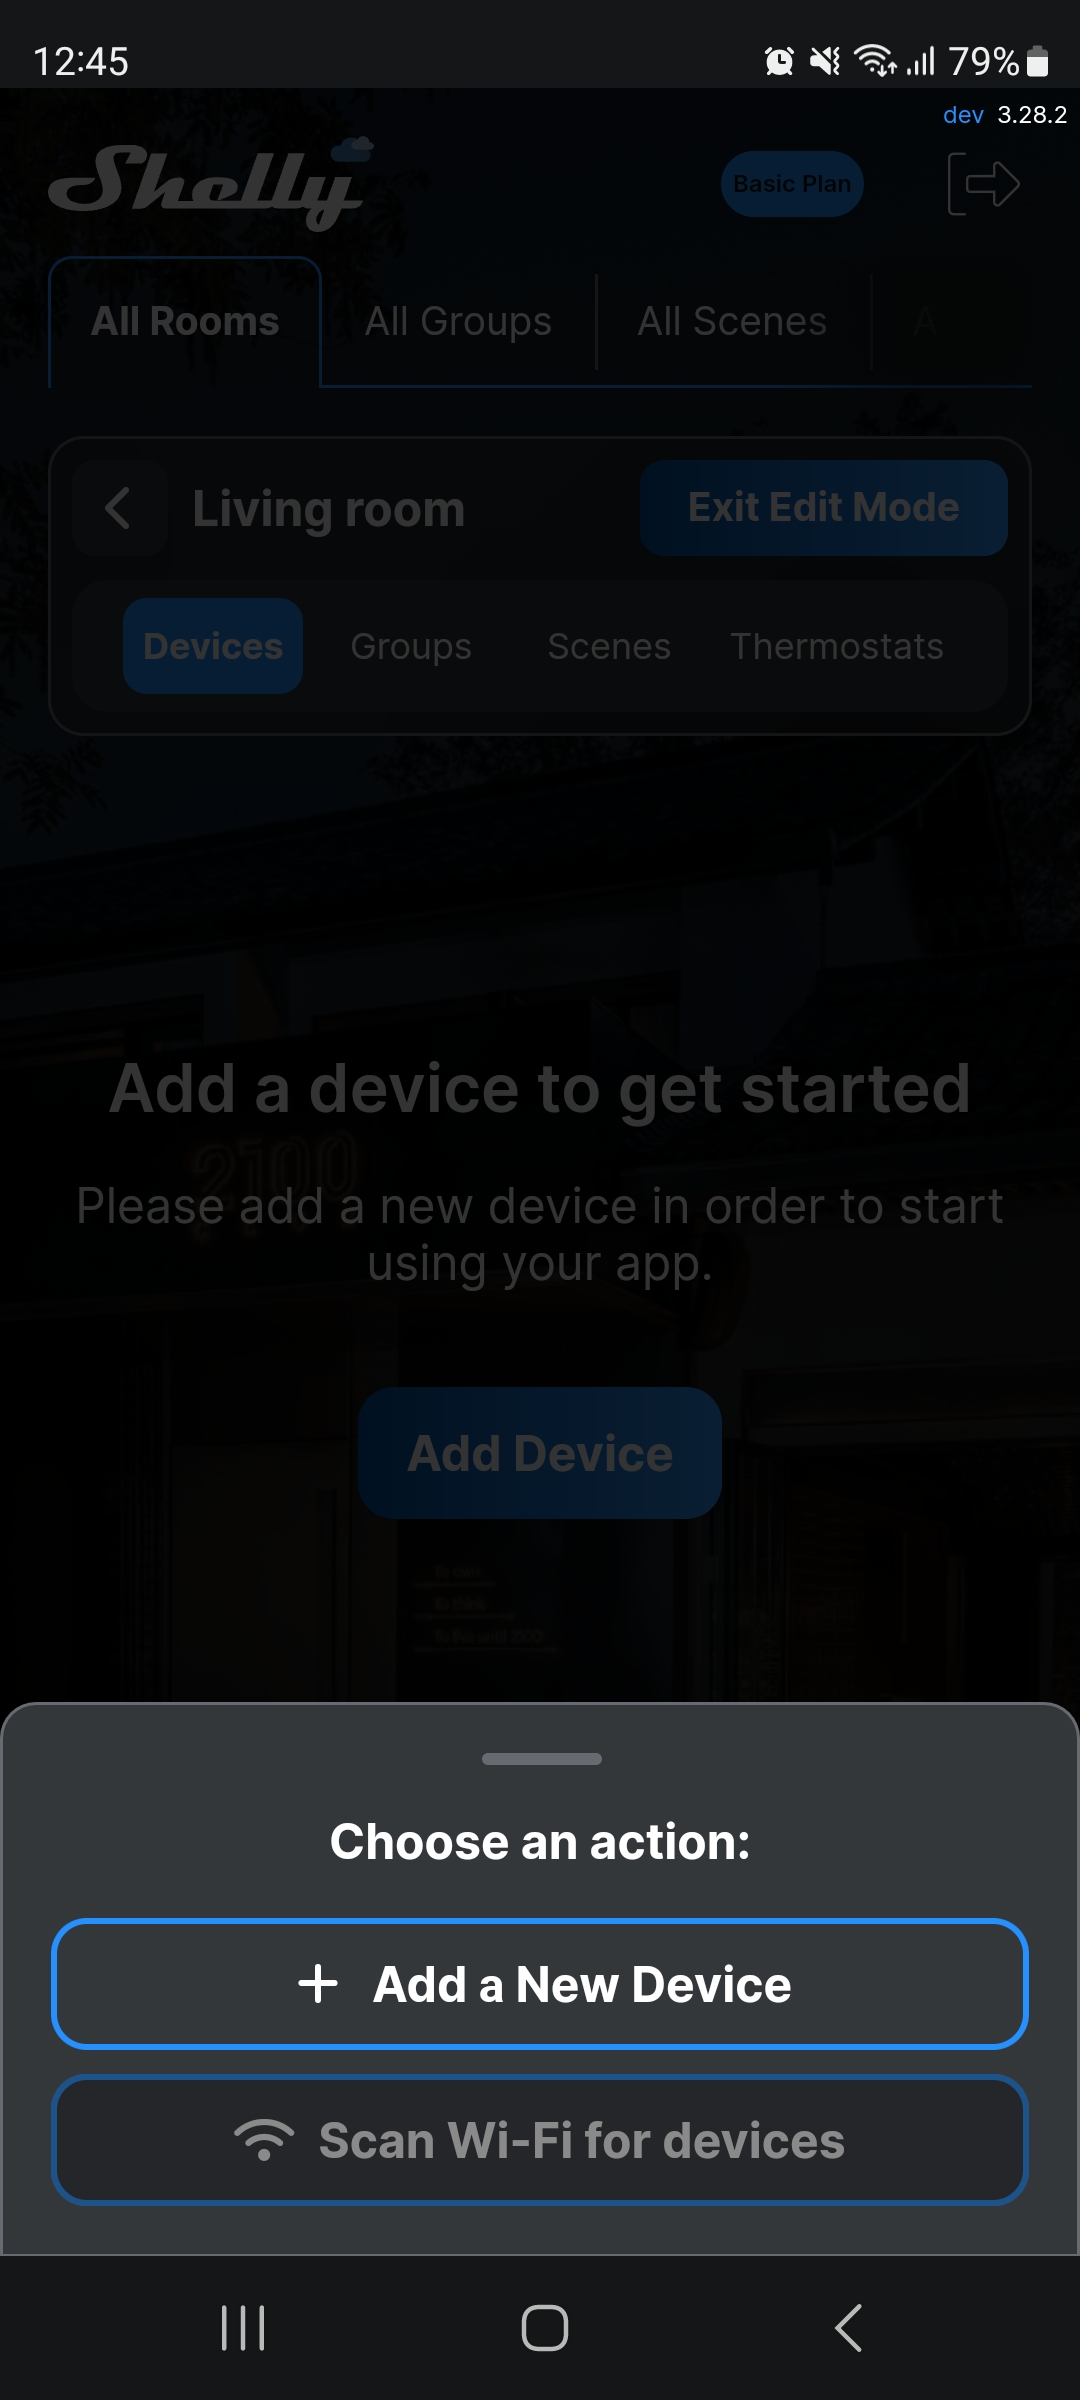
- Select + Add a New Device.
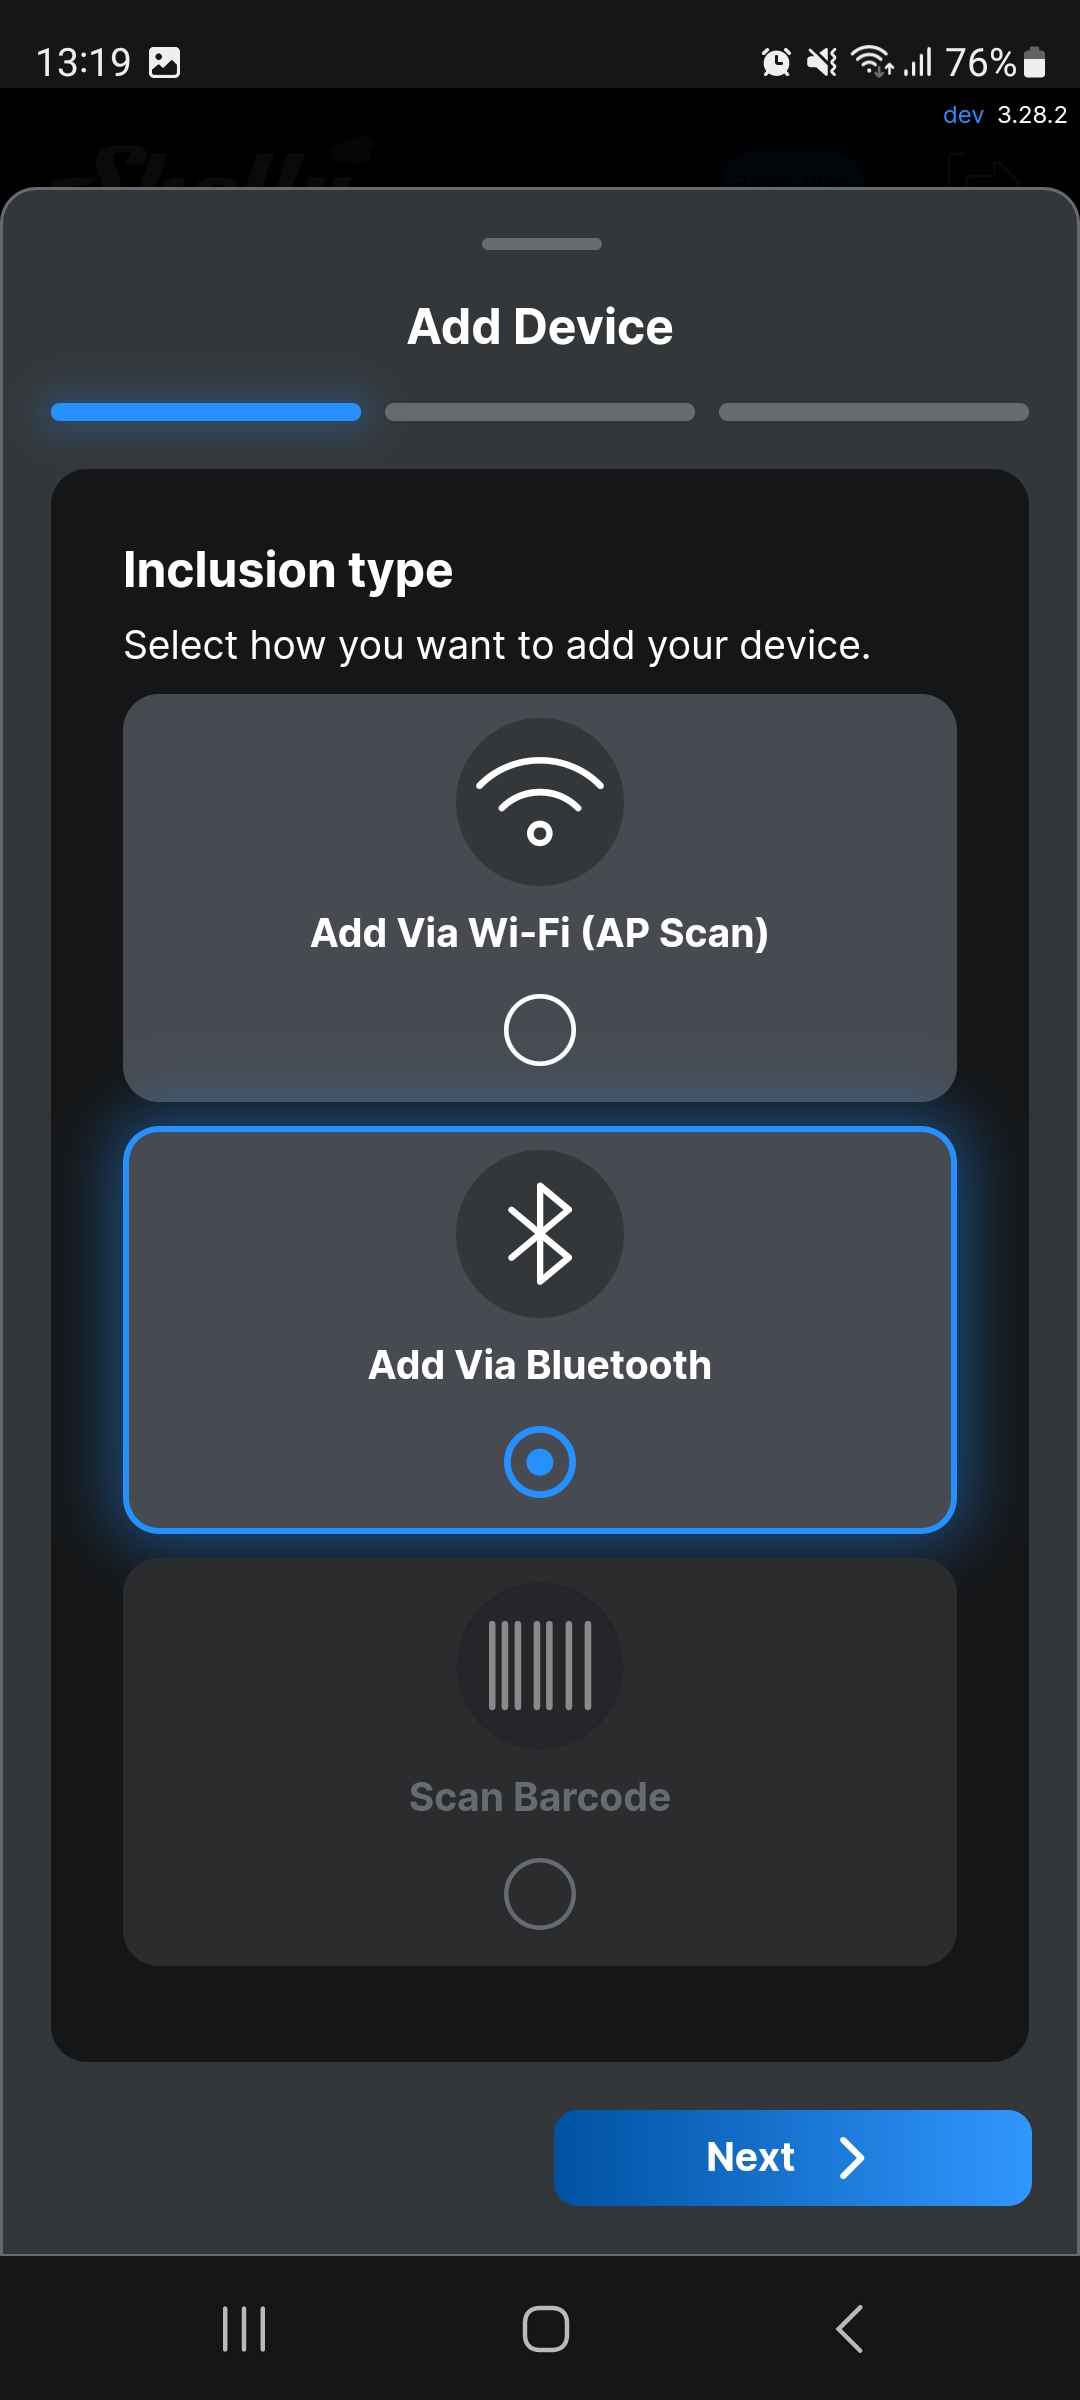
- Select Add via Bluetooth, then select Next.
- A list of all available devices appears on your screen.
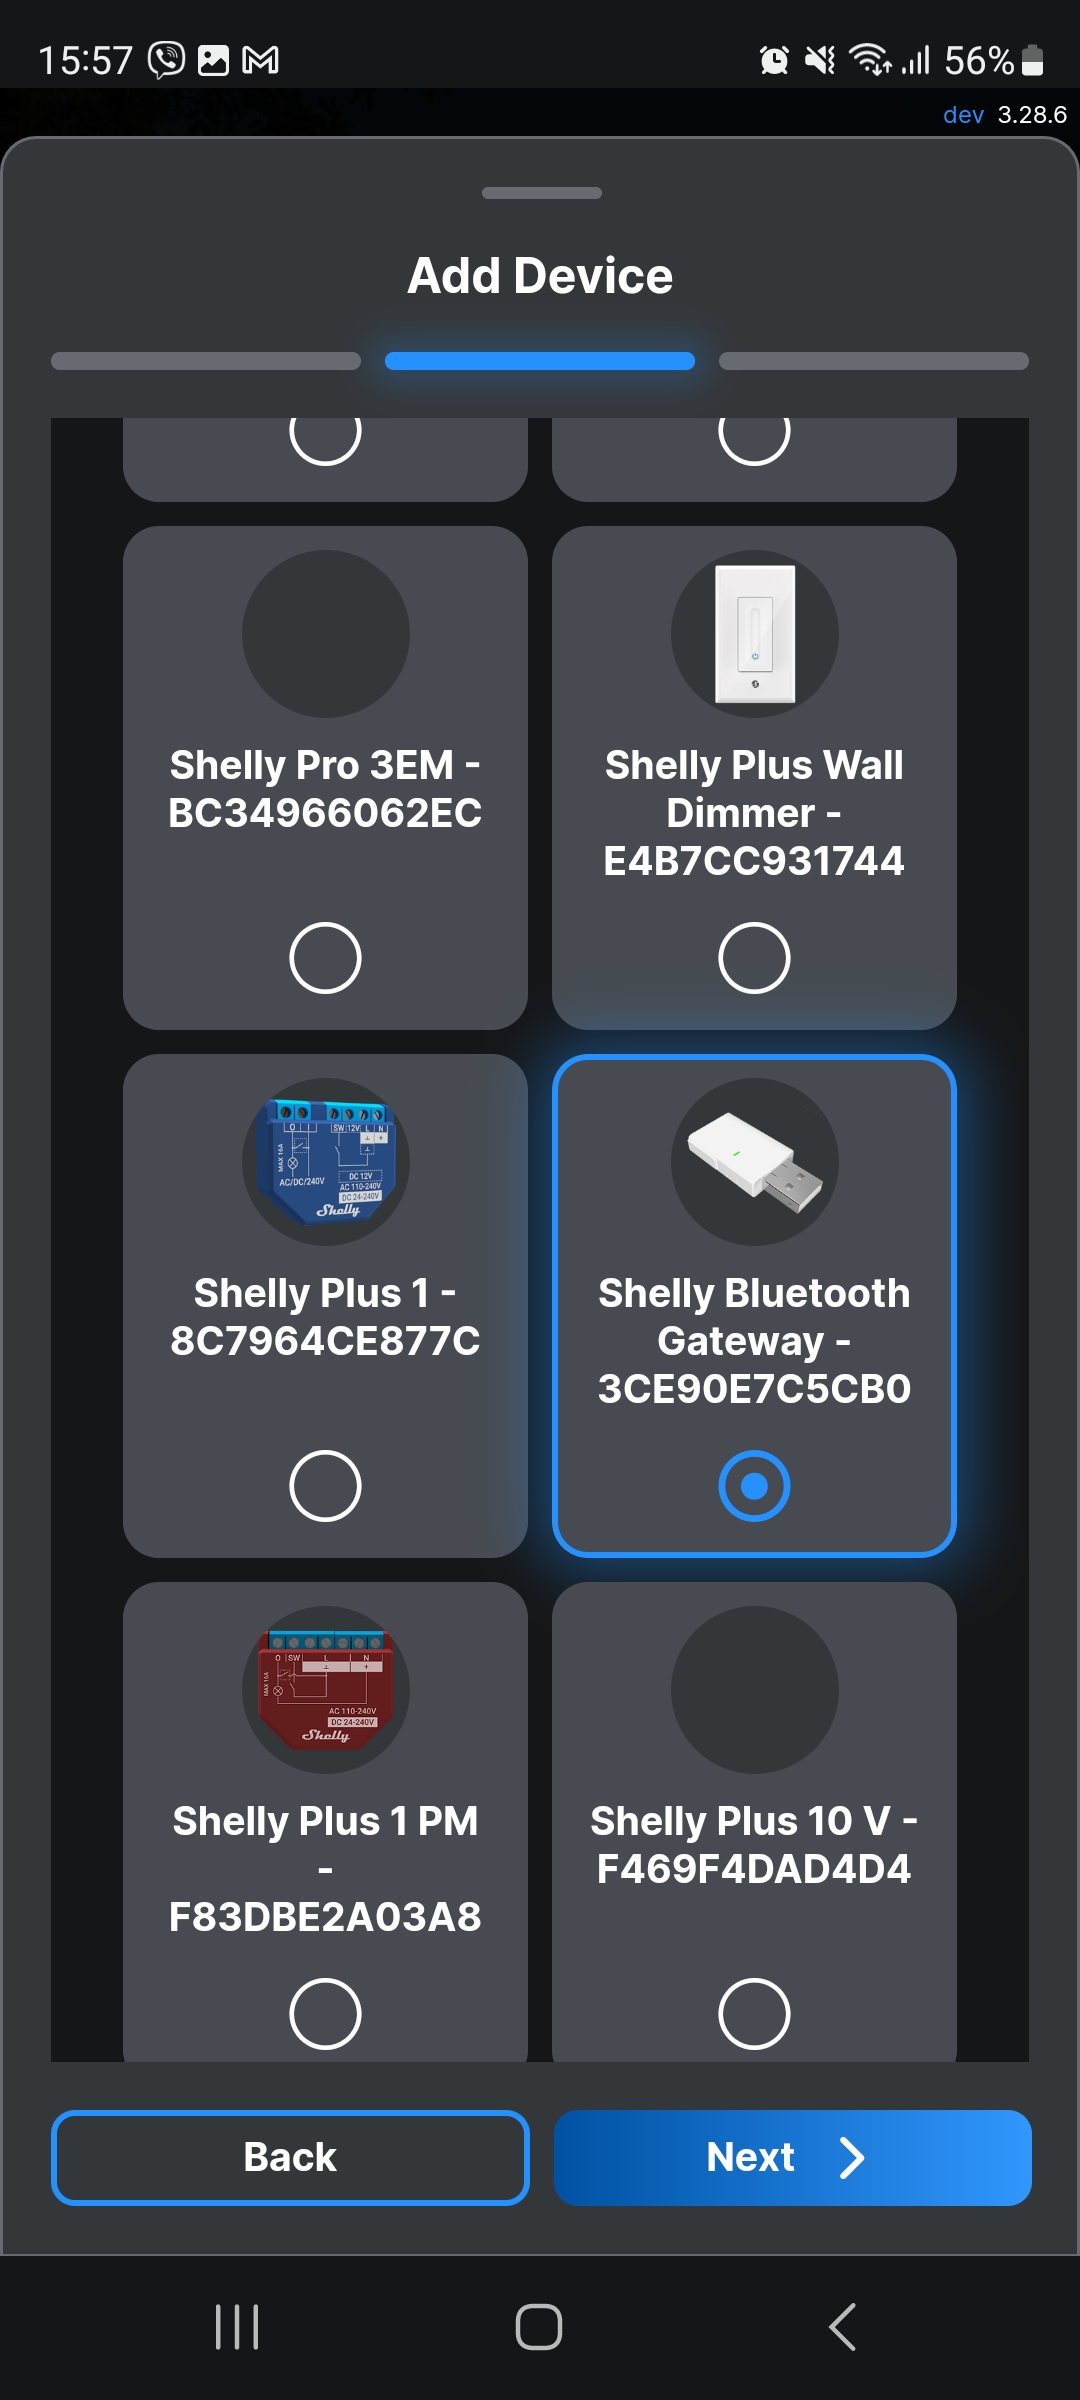
- Select Shelly Blu Gateway from the list, then select Next.
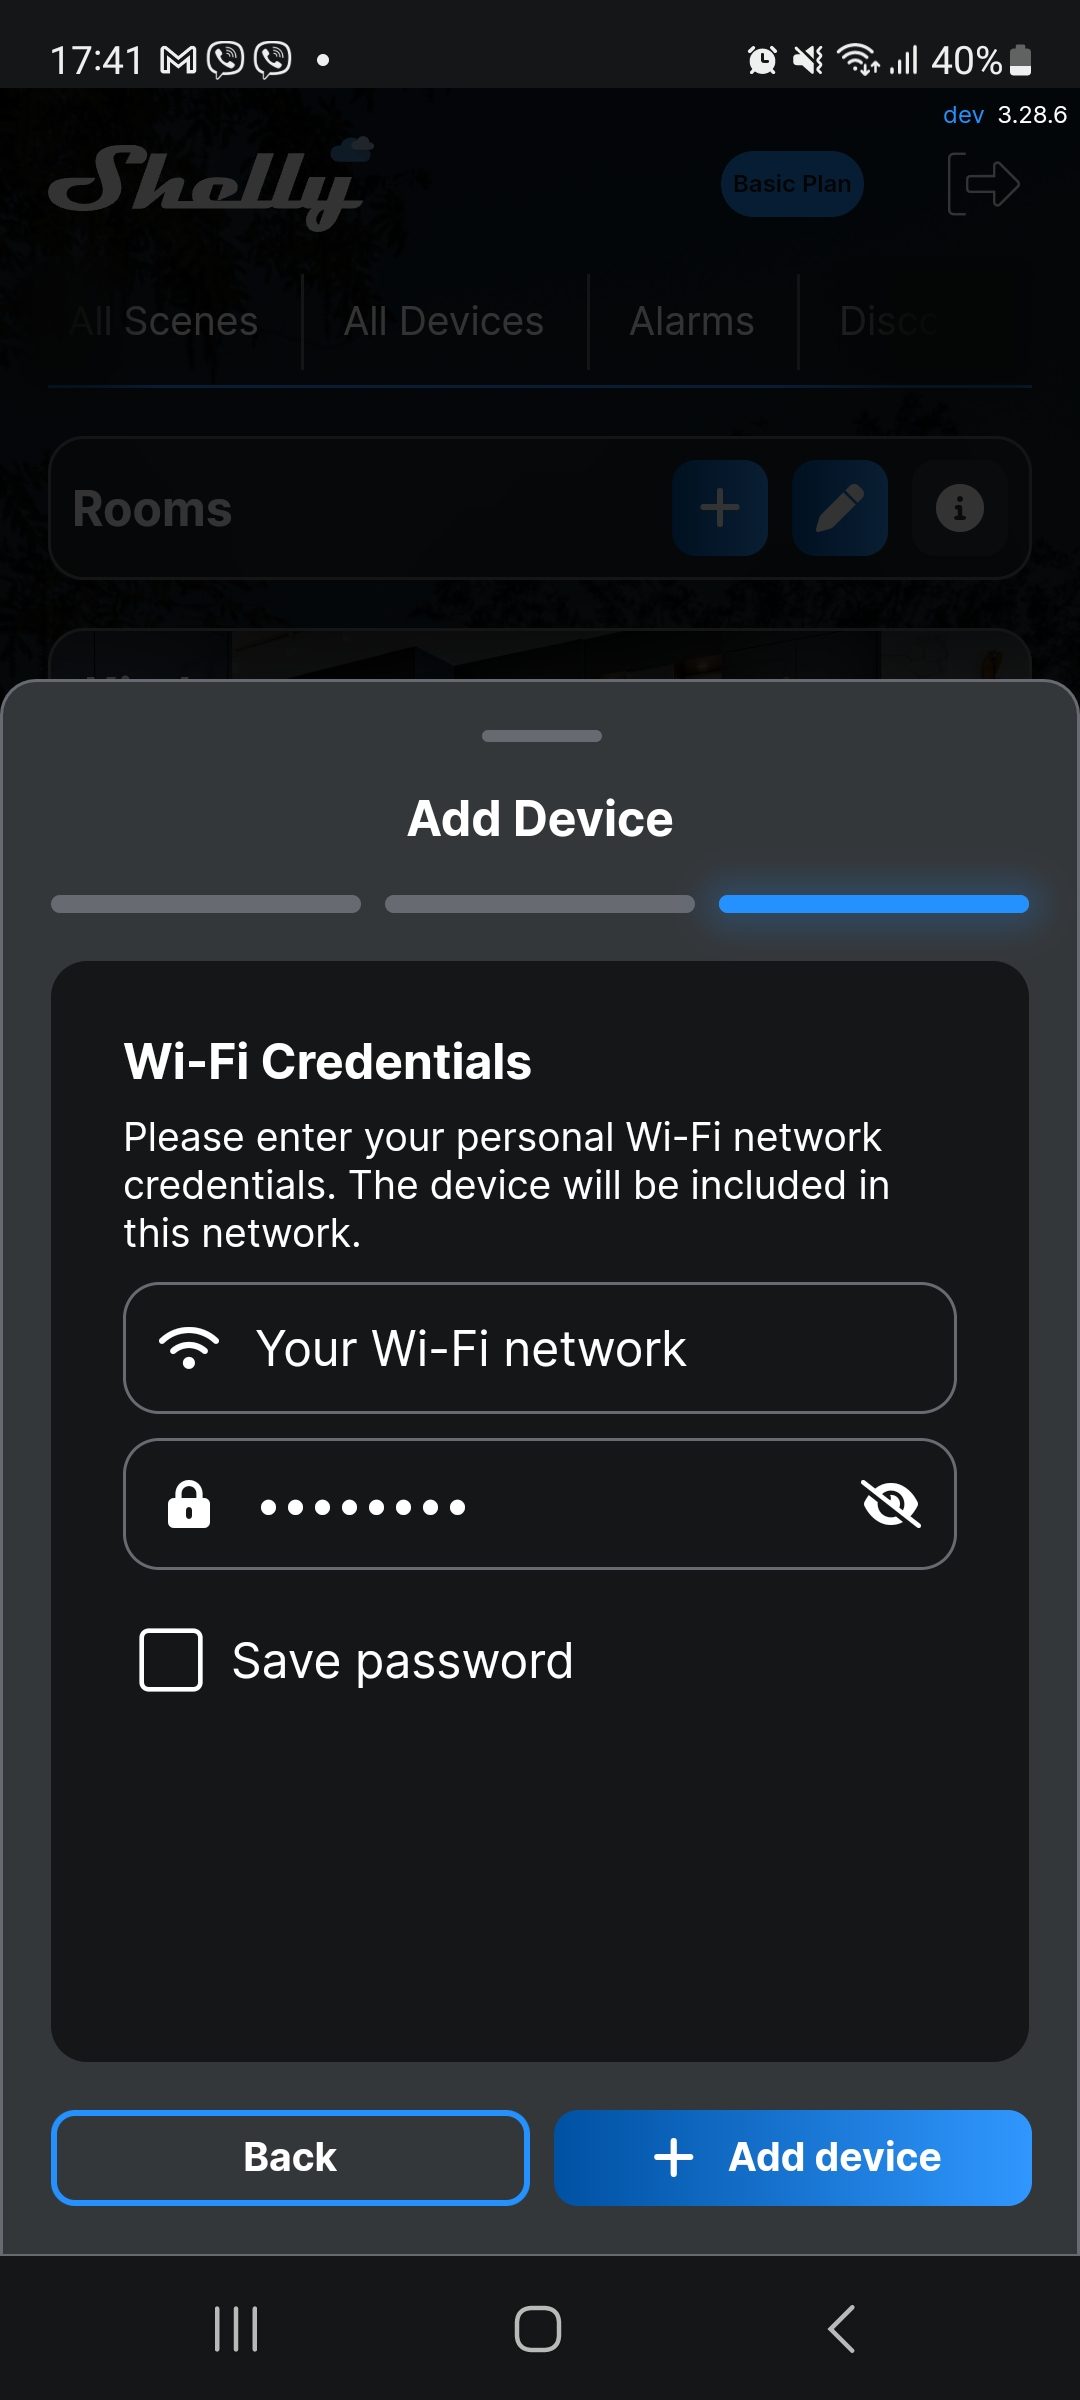
- Select the Wi-Fi network that you want to use to connect the Gateway. Type in the network password, then select + Add device.
If you have previously added devices and saved the network password, a message will appear asking you to confirm if you want to connect the new device to the same Wi-Fi network. If you want to change the network, select Edit.
- The LED indicator lights up in red, showing that the device is connecting to the Shelly cloud.
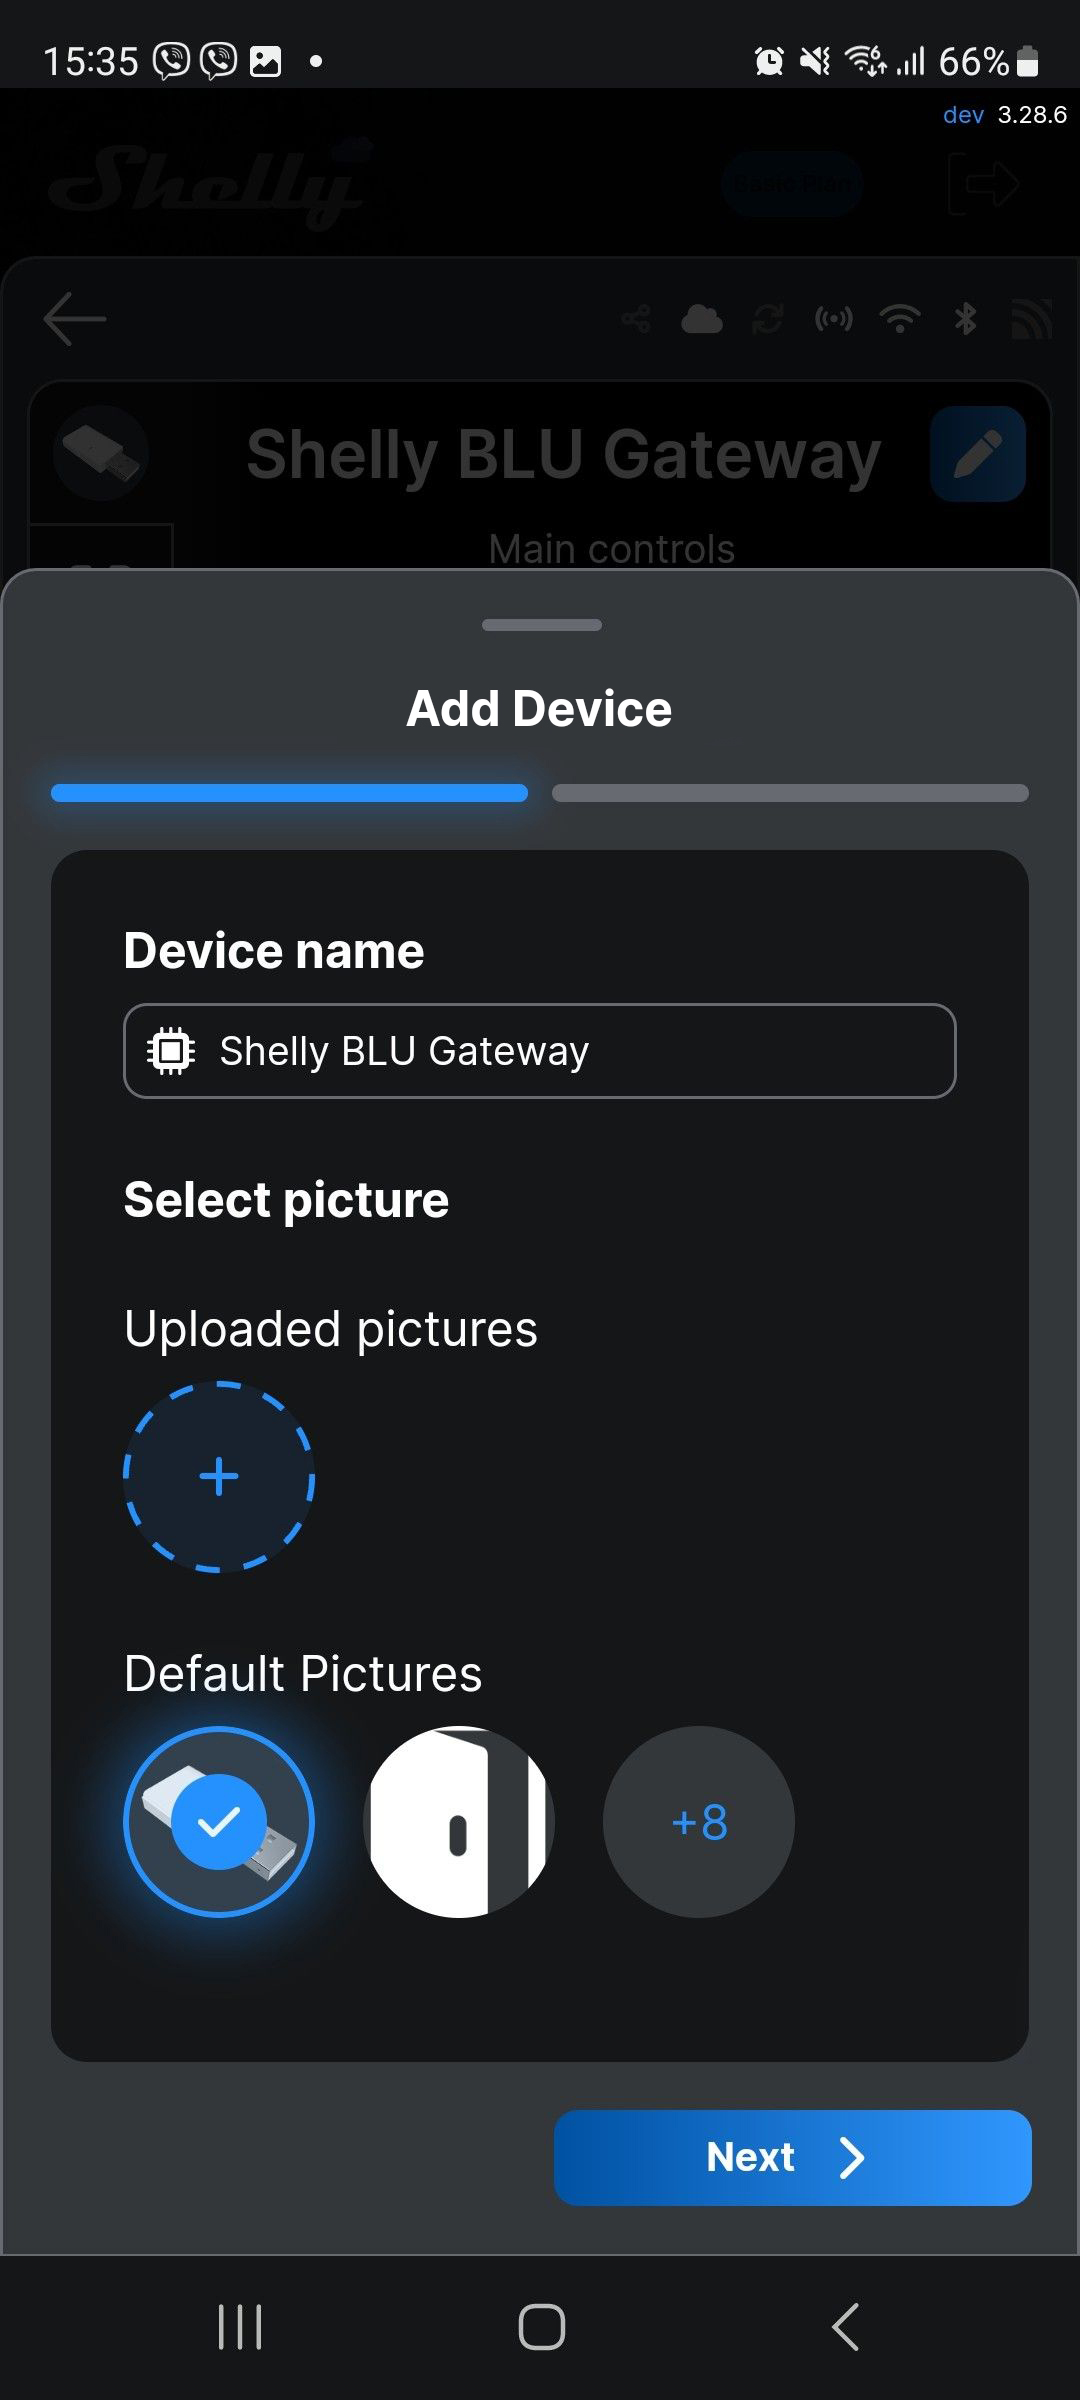
- Name the device and select a picture. Then, select Next.
.png)
- Add the Gateway to a room of your preference. Alternatively, create a new room and then select Save.
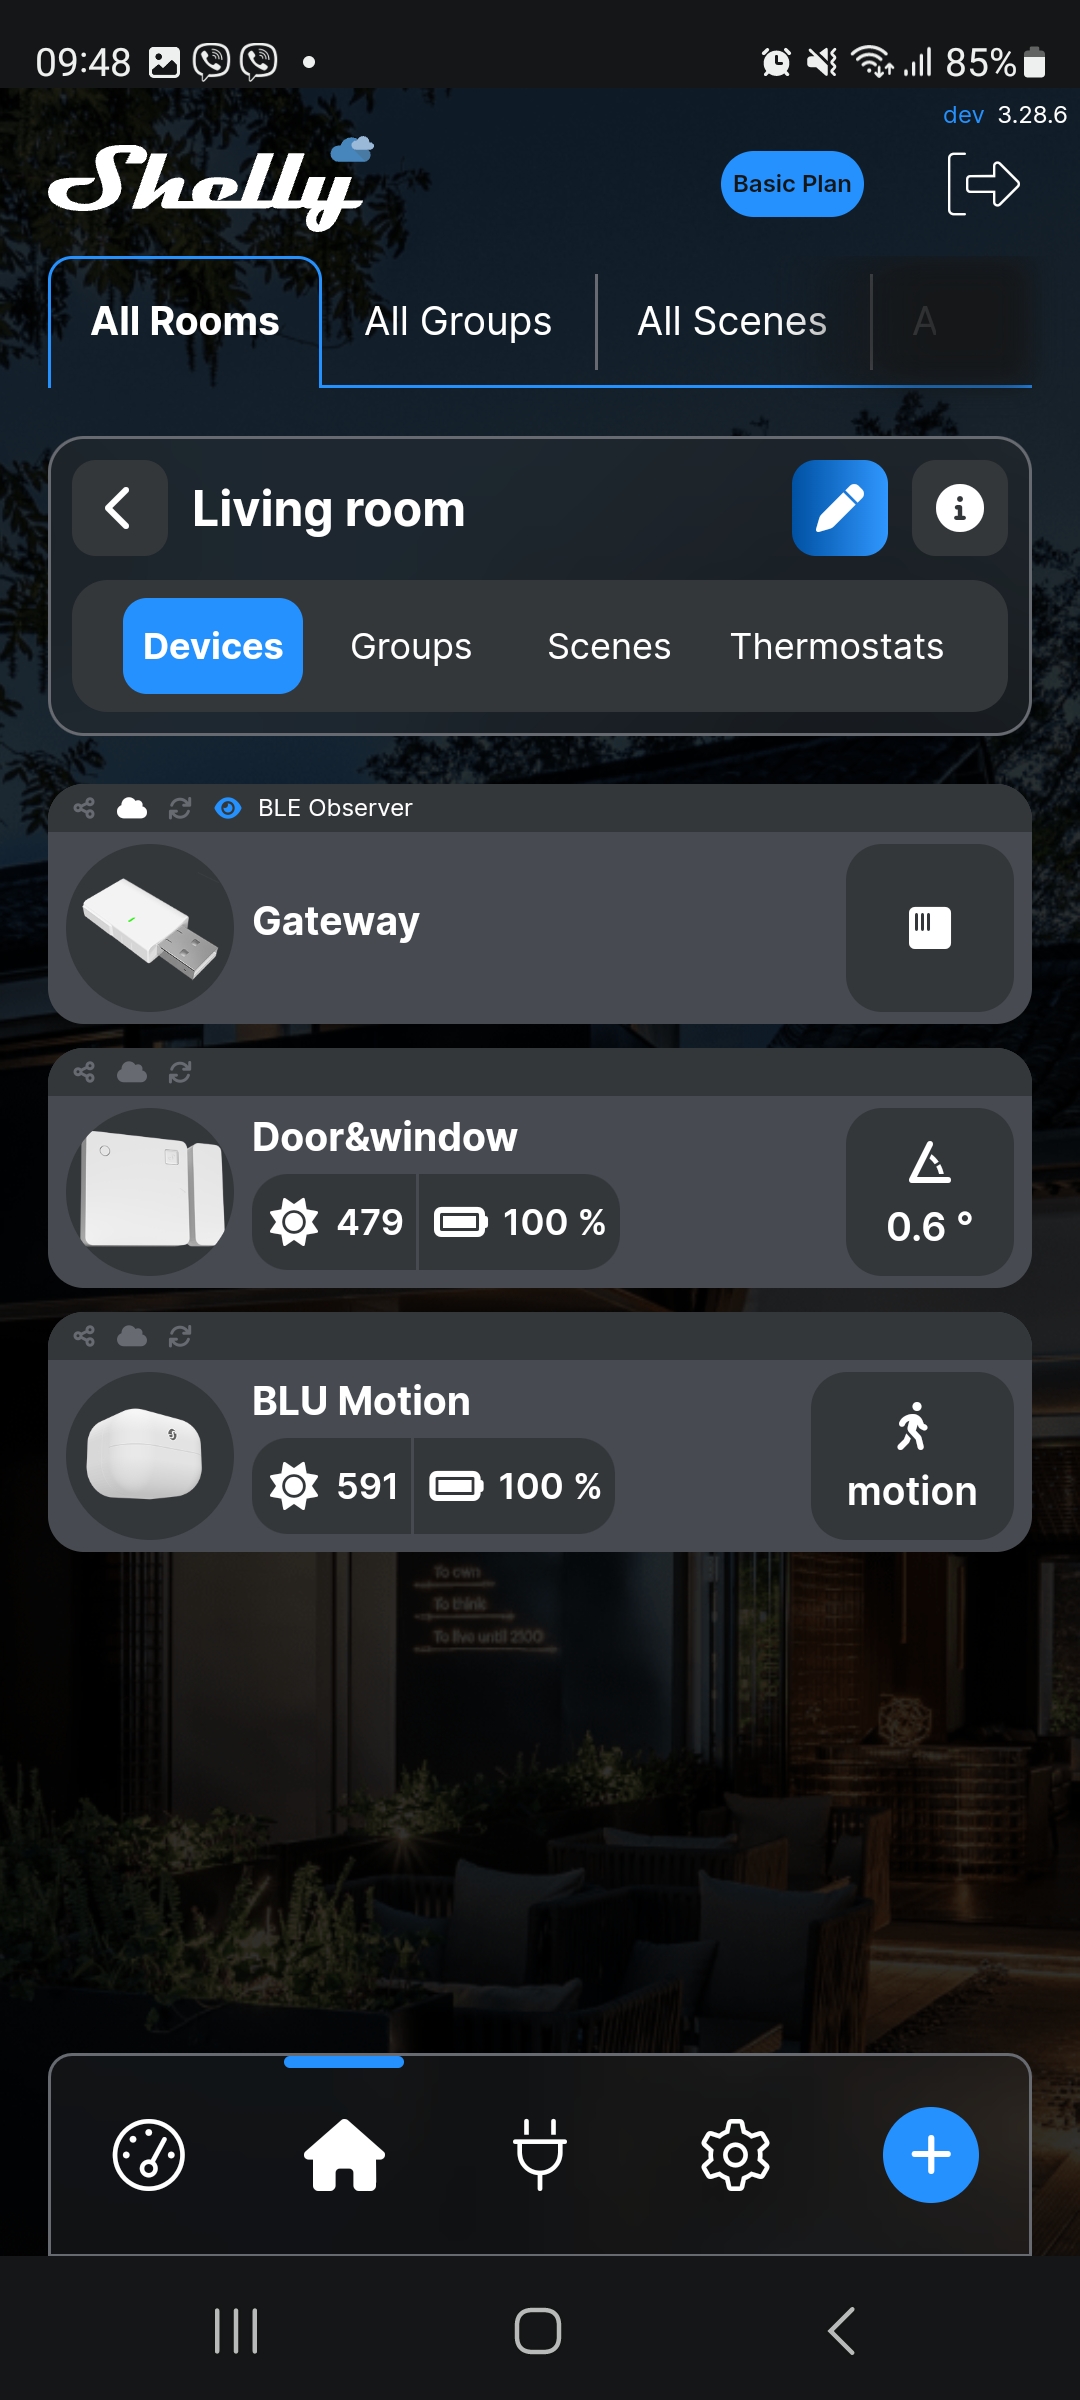
- The device is now added to your account. You can see all the sensors from the Smart BLU Bundle in the same room.
Additional Tips
- You can create more rooms and organize your devices accordingly.
- All sensors may appear as Pending Connection. You must activate them by pressing their control buttons.
- To improve your system security, we recommend encrypting your Bluetooth devices. For more details, visit: Encrypt your BLU Door/Window and BLU Motion devices